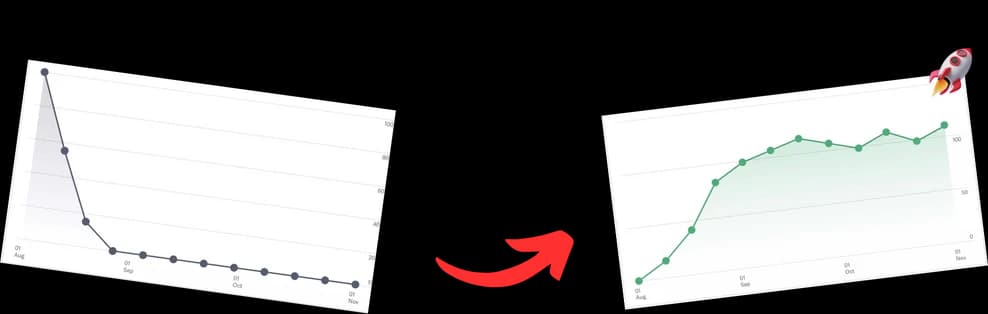
You've got a long video on your channel. Maybe it's a podcast, a webinar, a livestream replay, or a tutorial. Somewhere inside it is the moment people would share. The problem is that most viewers won't go hunting for it.
That's where clip in YouTube becomes useful. Not as a novelty button, and not as a replacement for editing, but as one part of a practical growth system. Some moments should become Clips. Some should become Chapters. Some deserve a full Short. Knowing the difference saves time and helps the right content reach the right audience.
Why YouTube Clips Are Your Secret Weapon for Growth
A common mistake is assuming the best part of a video will naturally get found. It usually won't. On YouTube, discoverability is brutally uneven.
A large analysis of platform performance found that nearly 9 out of 10 videos fail to reach 1,000 views on YouTube, which is exactly why creators need tools that surface strong moments faster, including Clips and other discovery features, as shown in this YouTube visibility analysis.
If you've uploaded a two-hour episode with one sharp, memorable answer buried deep in the timeline, asking viewers to “watch the full thing” isn't a strategy. It's friction.
What Clips do better than a normal share
A YouTube Clip lets a viewer or creator isolate one short segment from an existing video and share that exact moment. That changes the behavior around sharing.
Instead of sending someone a full-length link with vague instructions like “start around 1:12:40,” you send the moment itself. The recipient lands on the original video page, sees the exact segment, and can keep watching from there.
Practical rule: Use Clips when the value is already inside the long-form video and you need a faster entry point, not a new upload.
That matters most for channels built on long-form content. Podcasts, interviews, educational videos, and breakdowns often have strong moments that are bad at introducing themselves. Clips solve that packaging problem.
When Clips are the right move
Use a Clip when you want to:
- Highlight a specific takeaway that stands on its own
- Give viewers a shareable moment without exporting new media
- Drive traffic back to the original upload instead of splitting attention
- Test interest in a topic before you invest time in a full Short
Clips also fit neatly into a broader organic strategy. If your channel depends on search and recurring long-form traffic, this organic YouTube reach guide is worth pairing with your clipping workflow.
Clips won't rescue a weak video. They also won't replace strong titles, thumbnails, or structure. But when a video already has good moments, Clips make those moments easier to discover, easier to share, and easier to turn into more distribution.
How to Create a YouTube Clip in 60 Seconds
The native workflow is simple, which is one reason creators underuse it. You don't need editing software. You don't need to download the video. You just need an eligible video and a clear moment to isolate.
Here's what the interface looks like before you start:

According to YouTube's help documentation, signed-in users can create Clips that are 5 to 60 seconds long, add a title up to 140 characters, and share the result as a public link. The same documentation also notes that channels that enable and feature community clips can see 15-25% higher engagement from this traffic source in this official Clip feature documentation.
On desktop
If you're on a laptop or desktop browser, the process is fast:
- Open the video you want to clip.
- Find the Clip button under the player. If it's not visible immediately, open the More menu.
- Click Clip. You'll see the scissors icon and a small editing panel.
- Add a title. Keep it descriptive, because the title is what people will see when the link gets shared.
- Drag the timeline handles to choose your segment. YouTube requires a minimum of 5 seconds and a maximum of 60 seconds.
- Share the generated link. The Clip plays as a loop on the original video's watch page.
The key detail many creators miss is that this doesn't create a new upload. It creates a shareable window into the original video.
On mobile
The mobile app works similarly, though the button placement can feel tighter:
- Open the YouTube app and load the target video
- Scroll through the action row below the player until you see Clip
- Tap Clip, then adjust the selected range
- Name the Clip
- Tap share and send the public link where it makes sense
For many channels, mobile matters because clips often get shared in chats, communities, and social threads where speed matters more than polish.
The best Clip is usually not the funniest moment in isolation. It's the moment that creates enough curiosity for the viewer to continue into the full video.
What makes a Clip worth sharing
A weak clip usually starts too early, ends too late, or depends on too much missing context. A strong one does three things well:
| Element | What works | What fails |
|---|---|---|
| Start | Opens on tension, a question, or a claim | Opens with scene-setting or filler |
| Middle | Delivers one clear payoff | Wanders across multiple points |
| End | Leaves the viewer wanting the rest | Feels fully resolved and self-contained |
If you want another walkthrough focused on the mechanics, this guide to making YouTube clips is a useful companion resource. For creators trying to pull more moments out of existing uploads, this process for getting clips from YouTube videos also helps frame the workflow.
Advanced Clipping and Repurposing in YouTube Studio
The public Clip feature is for sharing moments from a video that already exists. YouTube Studio Editor solves a different problem. It helps you fix or tighten your own upload after it's live.
That distinction matters. If a video has a dead intro, a messy tangent, or extra downtime at the end, clipping won't repair the source asset. Studio editing will.
Here's the editor view creators use for those fixes:

A benchmark summary on YouTube clipping workflows notes that data-driven trims in YouTube Studio can boost watch time by up to 22%, and that the editor's non-destructive workflow preserves the original video URL while keyboard shortcuts can cut workflow time in half in this YouTube Studio trimming overview.
When to use Studio Editor instead of Clips
Use the Studio Editor when the original upload itself needs improvement. That usually means one of these situations:
- The opening is too slow and you need to remove dead air or setup
- A middle section drags and hurts retention
- A livestream replay starts with waiting-room fluff
- You need to remove an error without deleting the video and re-uploading it
The non-destructive part is what makes this useful. You don't lose the video's URL, comments, or accumulated views just because you cleaned up the timeline.
A practical trimming workflow
Inside YouTube Studio, go to Content, choose the video, and open Editor. From there, work in this order:
- Check audience retention first. Don't trim based on guesswork if your analytics already show where viewers drop off.
- Cut obvious friction. Long countdowns, repeated intros, mic issues, side tangents.
- Preview before saving so you don't remove context needed for the next segment.
- Use keyboard shortcuts while reviewing the timeline. That speeds up repetitive scrubbing.
Field note: The biggest editing mistake isn't under-trimming. It's cutting so aggressively that the video loses setup and the remaining section stops making sense.
Repurposing from the cleaned source
Once the source video is tighter, every downstream asset gets easier to make. Clips become cleaner. Shorts need less patchwork. Chapters become more accurate because the video has clearer transitions.
For teams that need more automation or larger-scale extraction, tools beyond native YouTube can help. If you're exploring API-style workflows and bulk processing, this piece on programmatic YouTube clipping with Mallary.ai is a useful reference point. For a broader planning layer around reuse, this content repurposing strategies guide is relevant when you're turning one upload into multiple assets.
Troubleshooting Why You Cannot Clip a YouTube Video
If the Clip button is missing, users might assume YouTube is bugging out. Usually it isn't. The video just isn't eligible, or the creator has restricted the feature.
The first thing to check is simple: are you signed in? The native Clip feature is built for signed-in users. If you're logged out, the option may not appear the way you expect.
Common reasons the Clip button is unavailable
These are the usual causes:
- The creator disabled clipping on the channel or video
- The video is private or restricted
- The content type doesn't support clipping
- The video's current status makes clipping unavailable
This is especially common with livestream-related content and children's content settings. Some creators also turn clipping off intentionally because they want tighter control over what gets shared from their catalog.
Creator-side settings matter
If it's your own channel and viewers can't create clips, check your settings in YouTube Studio. The feature can be disabled at the channel level through advanced settings.
That's a strategic choice, not just a technical one. Turning clipping off gives you more control over how moments get distributed, but it also removes a simple sharing mechanic from your audience.
If viewers regularly quote your videos in comments or share timestamps manually, that's usually a sign you should leave clipping enabled.
How to diagnose the issue quickly
Run through this short check:
- Test another video on the same channel. If one works and another doesn't, the issue is video-specific.
- Try desktop and mobile. Interface placement can differ enough to create false alarms.
- Confirm account status. Signed-in access matters.
- Review channel settings if you own the content.
If the feature still isn't available, don't force it. Some videos aren't meant for clipping in the native workflow. In that case, use YouTube Studio for your own edits or move the segment into a separate repurposing workflow.
Clips vs Chapters vs Shorts A Strategic Comparison
Creators often ask which format they should focus on. That's the wrong question. Clips, Chapters, and Shorts do different jobs. Channels grow faster when each one is used for its actual purpose.
This is the simplest way to think about it. Chapters organize, Clips highlight, and Shorts reach.

A creator-focused source on Shorts strategy states that optimizing clipped segments from long videos with SEO chapters is a key strategy for creating viral Shorts, and that recent YouTube updates prioritize chapter-linked clips in ways that can produce a 20% uplift in RPM for creators in this chapter-linked Shorts workflow reference.
What each format is actually for
| Format | Best use | Strongest benefit | Weakness |
|---|---|---|---|
| Clips | Share one moment from a long video | Fast distribution without new upload | Limited control over packaging |
| Chapters | Organize long-form content | Better navigation and clearer topic structure | Not inherently viral |
| Shorts | Turn one moment into a native short-form asset | Wider top-of-funnel discovery | Requires editing and repackaging |
Many creators waste effort in this regard. They use Shorts to solve a navigation problem, or they expect Clips to do the job of a fully edited vertical video.
When to choose Clips
Choose Clips when the original video is already doing the heavy lifting. You've got a strong moment. It stands on its own. You want a fast shareable link that sends people back to the source.
Good examples:
- A guest gives a sharp answer in a podcast
- A tutorial contains one high-value fix
- A livestream has one strong reaction or reveal
Clips are fast, but they aren't ideal when the moment needs reframing, captions, resizing, or a stronger hook.
When to choose Chapters
Choose Chapters when the video is long enough that navigation affects satisfaction. This matters a lot for podcasts, interviews, educational content, and product walkthroughs.
Chapters do two things well. They help current viewers skip to what they need, and they make your content easier to mine later for promotional moments. If your chaptering is clean, you can spot clip-worthy sections much faster than if you're scrubbing a two-hour timeline blind.
Decision rule: If the problem is “people can't find the right part,” use Chapters first. If the problem is “people won't share the right part,” use Clips. If the problem is “new viewers never see this at all,” build a Short.
When to choose Shorts
Shorts are the right move when you want a moment to function as its own piece of content. That means re-editing for pacing, adding visual framing, often changing the crop, and giving the segment a hook that works without the parent video.
That extra work is why Shorts can outperform Clips for discovery. But it's also why they cost more time.
The strongest system is sequential. Structure the long-form video with chapters. Identify the moments that earn attention. Turn the best ones into Clips for sharing and into Shorts for broader discovery.
Automating Your Clip and Chapter Workflow
Manual repurposing breaks down fast on long videos. If you're publishing interviews, podcasts, lessons, or panels, the bottleneck isn't usually recording. It's finding the moments afterward, naming them, syncing them, and turning them into assets without losing half a day.
That gets worse with multi-camera content. A single session can leave you hunting through long timelines just to identify where one segment starts cleanly and where another should be cut.

A workflow benchmark focused on long-form creators notes that manual clip synchronization for multi-camera edits can waste 2-5 hours per video, while AI systems that generate timestamps from audio can increase efficiency by 80% for podcasters and other long-form creators in this AI timestamp automation example.
What should be automated first
Not every step deserves automation. Start with the parts that are repetitive and time-heavy:
- Chapter generation for long videos with clear topic shifts
- Timestamp discovery for recurring segment formats
- Clip candidate identification based on transcript and topic changes
- Multi-camera sync support when audio cues can anchor the timeline
If you automate caption styling before you automate timestamping, you're solving the wrong problem first.
The workflow that scales
For most serious channels, a workable sequence looks like this:
- Publish the long-form video
- Generate chapters
- Review chapter titles and topic breaks
- Select the strongest chapter segments for Clips
- Promote the highest-potential ones as Shorts after editing
That order matters because chapters create a map. Once the map exists, clipping stops feeling like searching and starts feeling like selecting.
One option in this workflow is TimeSkip, a Chrome extension that generates SEO-oriented YouTube chapters and timestamps for long videos, which can then serve as a roadmap for clipping and repurposing. It's one example of using chapter generation as the first pass before you decide which moments should stay as Clips and which should be rebuilt as Shorts.
Trade-offs creators should expect
Automation helps with speed and consistency. It doesn't remove editorial judgment.
You still need to decide:
- Which moments make sense without extra context
- Which chapter titles sound useful instead of robotic
- Which clips deserve vertical re-editing
- Which sections should stay inside the main video only
Don't automate selection and assume quality follows. Automate the search work, then make human decisions about packaging.
That's the essential shift for channel growth. Stop treating clipping as a one-off task you do when you remember. Build a repeatable system where chapters guide clip selection, clips test audience response, and Shorts amplify the winners.
If you publish long videos and want a faster way to turn them into structured, discoverable assets, TimeSkip is worth trying. It helps generate chapter timestamps quickly, which makes it easier to organize videos, identify shareable moments, and build a repeatable clip in YouTube workflow without scrubbing every minute by hand.