So, you've found that perfect moment in a YouTube video. Maybe it's a hilarious quote, a game-changing tip in a tutorial, or a highlight reel-worthy play you just have to share. The good news? You don't need a full-blown video editing suite to snip it out.
Getting a clip from YouTube is actually pretty straightforward. The quickest way is to use YouTube's own Clip feature, which lets you grab and share a 5-60 second segment in just a few clicks. But if you need more control, want a longer clip, or need to download an actual file, you'll want to look at browser extensions or dedicated online tools.
The right method really just depends on what you're trying to do. Sending a funny bit to a friend? The built-in tool is perfect. Pulling a segment for a reaction video or a social media post? You'll probably want a tool that gives you a downloadable file.
Choosing the Right Clipping Method
To make it easy, we've mapped out the different paths you can take based on your goal. Think of this as a quick decision tree to get you to the right tool for the job.
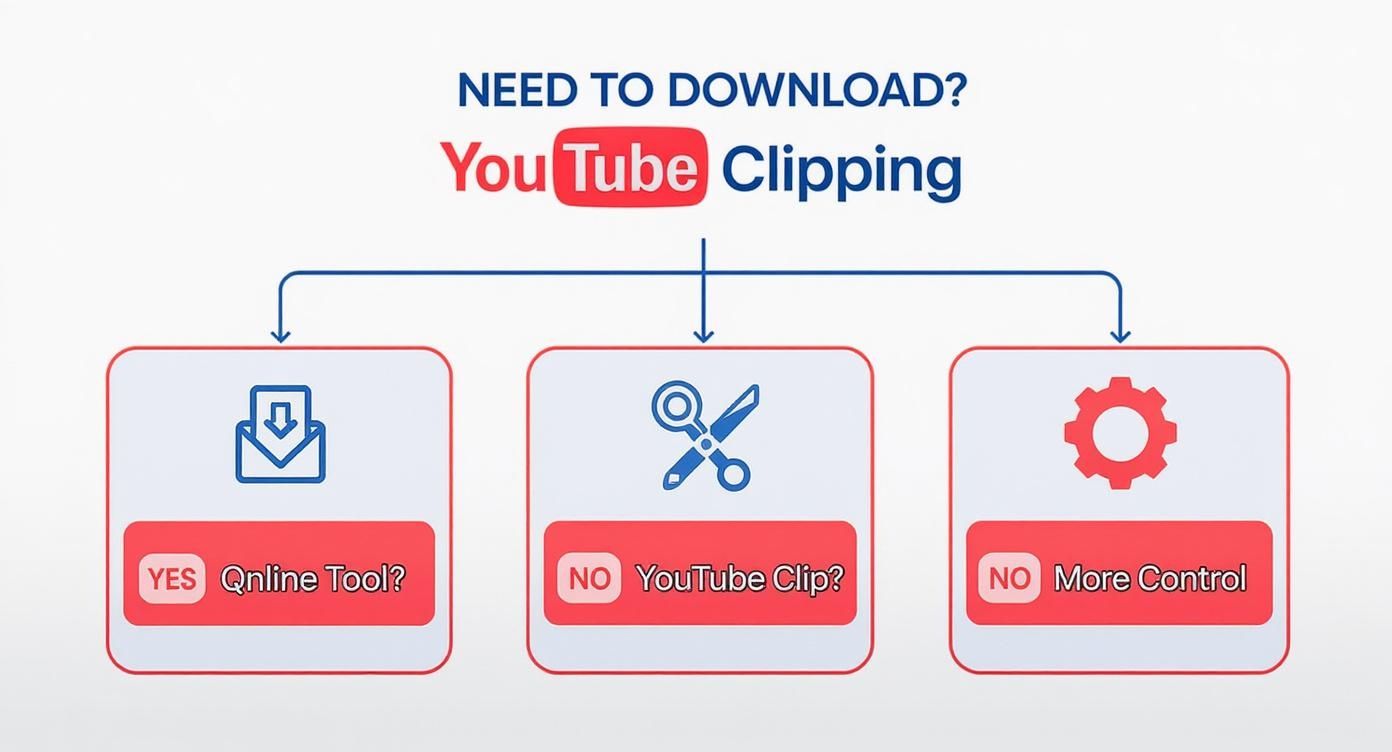
As you can see, the built-in YouTube Clip feature is your best bet for fast, simple sharing right on the platform. But when you need an actual video file to save on your device, online downloaders and editors are the way to go.
Comparing the Best YouTube Clipping Methods
To help you decide at a glance, here’s a quick comparison of the most common methods. Each has its own strengths, so it's all about matching the tool to your specific task.
| Method | Best For | Ease of Use | Download Option |
|---|---|---|---|
| YouTube's Clip Feature | Quick, casual sharing on social media or direct message. | Very Easy | No |
| Browser Extensions | Convenient clipping without leaving the YouTube page. | Easy | Usually Yes |
| Online Downloaders | Downloading specific segments as MP4 files for editing. | Moderate | Yes |
| Screen Recording | Capturing clips from videos where clipping is disabled. | Moderate | Yes |
Ultimately, the goal is to pick the path of least resistance. For a quick social share, stick with YouTube's native tool. For any project that involves editing, you'll need a method that provides an MP4 file.
The core idea is to match the tool to the task. Using YouTube’s native Clip tool for a quick social media share is fast and efficient, while a dedicated online tool is better for projects requiring an actual MP4 file for editing.
Once you get the hang of pulling clips, you can start thinking about bigger content repurposing strategies. Taking a powerful moment from a long-form video and turning it into a bite-sized, shareable asset is one of the smartest ways to get more mileage out of your content. If you want to dive deeper, we have a whole guide on that here: https://timeskip.io/blog/content-repurposing-strategies. If you want to turn those clips into a full cross-platform workflow, PostOnce.to helps you repurpose and publish them as platform-native social posts.
Using YouTube’s Native Clip Feature
Sometimes, the quickest way is the best way. For getting clips from YouTube, the platform's own built-in tool is about as direct as it gets. The "Clip" feature is designed for one thing: grabbing and sharing short, memorable moments without ever leaving the YouTube page.
It's perfect for capturing a killer punchline from a comedy special, a single game-changing insight from a long lecture, or a wild highlight from a gaming stream. The feature lets you isolate any segment between 5 and 60 seconds long and generates a unique link for it. When someone clicks that link, they’re taken right to the video, and it autoplays the exact part you selected on a loop.
How to Create a YouTube Clip
Making a clip is incredibly straightforward. Just look for the little scissors icon labeled "Clip" sitting among the other options like "Share" and "Download" right below the video player.
Click it, and a clipping box pops up. From there, it’s just a few simple moves:
- Pinpoint Your Segment: A blue slider will appear. Just drag the handles to set the start and end points for your clip. You can also type in the exact timestamps if you know them. Keep in mind, you’re capped at 60 seconds.
- Give It a Good Title: This is more important than you might think. A good title provides context. Instead of the default, name it something useful like, "Key Point on SEO Strategy" or "Funniest Moment from the Livestream." This title travels with the shared link.
- Share It Out: Hit the "Share clip" button. YouTube gives you a direct link and quick-share buttons for platforms like Facebook, X (formerly Twitter), or Reddit. Or, just copy the link and paste it wherever you want.
Let's say you’re watching a guitar lesson and want to save the 15-second bit where the instructor nails a tricky chord progression. You can clip just that part, title it "How to Play the G Major 7th Chord," and instantly you’ve got a shareable micro-lesson.
What if the Clip Button Is Missing?
Ever go to clip something and the button just isn't there? It’s not a bug. It's actually a setting the channel owner controls.
Some creators, especially those making content for kids or those worried about their work being taken out of context, choose to disable the clipping feature on their videos.
Key Takeaway: The YouTube Clip feature is a sharing tool, not a downloading tool. It creates a link that points back to the original video. If that original video gets deleted or set to private, your clip link will break.
The Pros and Cons of Native Clipping
Like any tool, the built-in clipper has its strengths and weaknesses. It's crucial to know what they are before you commit.
Benefits of Using the Native Clip Feature:
- Speed and Convenience: Nothing is faster. It’s all done in a few clicks without any extra software or websites.
- Creator Attribution: Every clip links directly back to the source, which means the original creator gets the credit and the views.
- Dead Simple: The interface is so intuitive that anyone can use it, no technical skills required.
Limitations to Consider:
- No Download Option: This is the big one. You can't save the clip as an MP4 or GIF file to your computer. It’s a link, not a file.
- Creator Dependent: It only works if the channel owner has enabled it. If they haven't, you're out of luck.
- Strict Length Limit: That 60-second maximum is a hard cap. If you need a longer segment, this tool won't work for you.
Ultimately, for quick, on-the-fly sharing where you want to give credit and don't need a physical file, YouTube's native tool is a fantastic option. But the moment your project requires an actual video file for editing, presentations, or offline viewing, you’ll need to turn to one of the other methods.
How Browser Extensions Expand Your Clipping Power
When YouTube's built-in Clip feature just doesn't cut it, browser extensions are your best friend. Think of them as small, powerful apps that plug directly into your browser, adding a whole new layer of functionality right on the YouTube page. For anyone serious about creating content from YouTube videos, these tools are an absolute game-changer.
The native tool is fine for a quick share, but its 60-second limit is a real roadblock for more ambitious projects. What if you're a streamer making a reaction video? You'll need to pull several clips, some longer than a minute, and splice them into your own footage. Or maybe you're a marketer grabbing a high-quality snippet from a customer testimonial. A simple share link is useless in these cases—you need an actual video file.
This is where extensions shine. They usually add a button or menu right below the YouTube video player, letting you download specific segments with total precision. You can set exact start and end times, pick your video quality (from 360p up to 4K), and save the clip straight to your computer as an MP4 or even an animated GIF.
Finding and Installing the Right Extension
Your first stop should be your browser's official marketplace, like the Chrome Web Store or Firefox Browser ADD-ONS. It's really important to stick to these official sources to steer clear of shady software. Always look for extensions with a high user count and a ton of positive reviews—that’s usually a good sign they're safe and reliable.
Once you find an extension you like, getting it set up is a breeze:
- Just click the “Add to Browser” button on the extension’s store page.
- Your browser will pop up a window asking for permissions. A good clipper will only ask for what it needs to work on YouTube.
- Once you approve, the extension installs, and you'll typically see its icon appear in your browser's toolbar.
After it's installed, head over to any YouTube video. You should now see a new button, probably labeled "Download" or "Clip," hanging out near YouTube's own controls.
Comparing Popular Clipping Extensions
Not all extensions are built the same. Some are designed for quick and simple clips, while others are packed with advanced features for power users. Here’s a quick breakdown to help you figure out what you need.
| Feature | Extension Type A (Simple Clipper) | Extension Type B (Advanced Downloader) |
|---|---|---|
| Primary Function | Quick MP4 and GIF creation from a specific segment. | Full video downloads with optional segment trimming. |
| Best For | Social media managers and educators needing quick snippets. | Video editors and creators needing high-res, longer clips. |
| Output Formats | MP4, GIF | MP4, WEBM, MP3 (audio only) |
| Unique Features | Often includes a simple, visual timeline for trimming. | May offer batch downloading or 4K/8K quality options. |
For a deeper look at specific tools, I highly recommend this guide on the best Chrome extensions for YouTubers. It’s full of detailed reviews and recommendations.
A quick word of caution: whenever you install a third-party tool, be smart about your digital security. Always read user reviews, check the developer’s privacy policy, and be suspicious of extensions that ask for permissions that don't make sense.
For instance, there's no good reason a video clipper would need access to your browsing history on every website. If you stick to well-vetted extensions, you’ll get the clips you need without putting your data at risk. In the end, using a browser extension is one of the most efficient ways to get clips from YouTube, offering a perfect blend of convenience and control.
Downloading and Editing Videos for Custom Clips
For the ultimate creative control, nothing beats downloading the full YouTube video and crafting your clips from the ground up. While native tools and browser extensions are handy for a quick grab, this method opens up a world of possibilities for creating polished, professional, or highly customized content.
This is the path for anyone serious about creating slick highlight reels, in-depth video analyses, or social media content that truly stands out. It's a two-step dance: first, you safely download the video file, then you use editing software to trim, refine, and add your own magic. It’s a bit more involved, but the results are absolutely worth it.
Choosing Your Download Tool
To get started, you'll need the source file. There are tons of tools out there for this, but they generally fall into two camps: online downloaders and desktop software.
- Online Video Downloaders: These are just websites where you paste a YouTube URL, and it spits out a download link. They're perfect for quick, one-off downloads when you don't want to install anything.
- Desktop Software: These are dedicated apps you install on your computer. They often pack more of a punch, with features like batch downloading (grabbing multiple videos at once), higher resolution options (4K or even 8K), and the ability to snag entire playlists.
For more advanced editing or if you need to work offline, a dedicated YouTube Video Downloader is your best bet for getting the full video file. The right choice really just depends on your project. A single clip? An online tool will do just fine. An ongoing content series? A desktop app is a smarter investment.
Editing Your Clips for Maximum Impact
Once you’ve got that MP4 file, the real fun begins. You don't need expensive, Hollywood-level software to make killer clips. In fact, many incredibly powerful video editors are completely free and surprisingly easy to get the hang of.
Your main goal here is to trim the fat and isolate that perfect moment. Just open the video file in your editor and use its trimming or cutting tools to set your start and end points. This is where you have a huge advantage over other methods—there's no 60-second limit, and you can be frame-perfect with your timing.
Free Software Options to Get You Started
- DaVinci Resolve: This is a monster of an editor that pros use, but the core version is free. It’s fantastic for color correction and advanced effects if you want to give your clip a cinematic feel.
- Clipchamp: Now part of Windows 11, Clipchamp is a super user-friendly, browser-based editor. It's a great starting point for beginners and comes with simple tools for adding text, transitions, and stock media.
- CapCut: Originally a mobile app, CapCut’s desktop version has become famous for its easy-to-use interface and trendy effects. It’s the go-to for creating content destined for TikTok or Instagram Reels.
If you're trying to figure out the right tool for your needs, our video editing software comparison can help you weigh the pros and cons of the top contenders out there.
The real power of this method is what you can do after you trim the clip. You can add text overlays to provide context, combine multiple clips from different videos into a compilation, or lay background music to set the mood.
Navigating Copyright and Fair Use
Okay, let's talk about the important legal stuff. Downloading and re-uploading someone else's content comes with strings attached. YouTube's Content ID system is incredibly good at spotting copyrighted material, which could get your video blocked, demonetized, or even earn your channel a copyright strike.
But here’s the thing: using clips often falls under the doctrine of "fair use." This legal concept allows for the limited use of copyrighted material without permission for things like criticism, commentary, news reporting, teaching, or research.
To keep yourself in the clear, stick to these guidelines:
- Be Transformative: Don't just re-upload a clip as-is. Add your own unique commentary, analysis, or creative spin that makes it something new. Think reaction videos and reviews.
- Use Only What's Necessary: Clip only the small portion of the video that’s absolutely essential to make your point. Using a 10-second snippet to illustrate an idea is far more likely to be considered fair use than a 10-minute segment.
- Give Credit: Always credit the original creator in your video and description. It’s not a legal magic bullet for fair use, but it's good etiquette and can help you avoid unnecessary drama.
- Don't Harm the Original's Market: Your clip shouldn't act as a replacement for the original video. For instance, don't upload all the "best parts" of a movie if it discourages people from actually buying or renting it.
This manual download-and-edit approach gives you the highest level of control and quality, making it the top choice for serious content creators who need to make something truly their own.
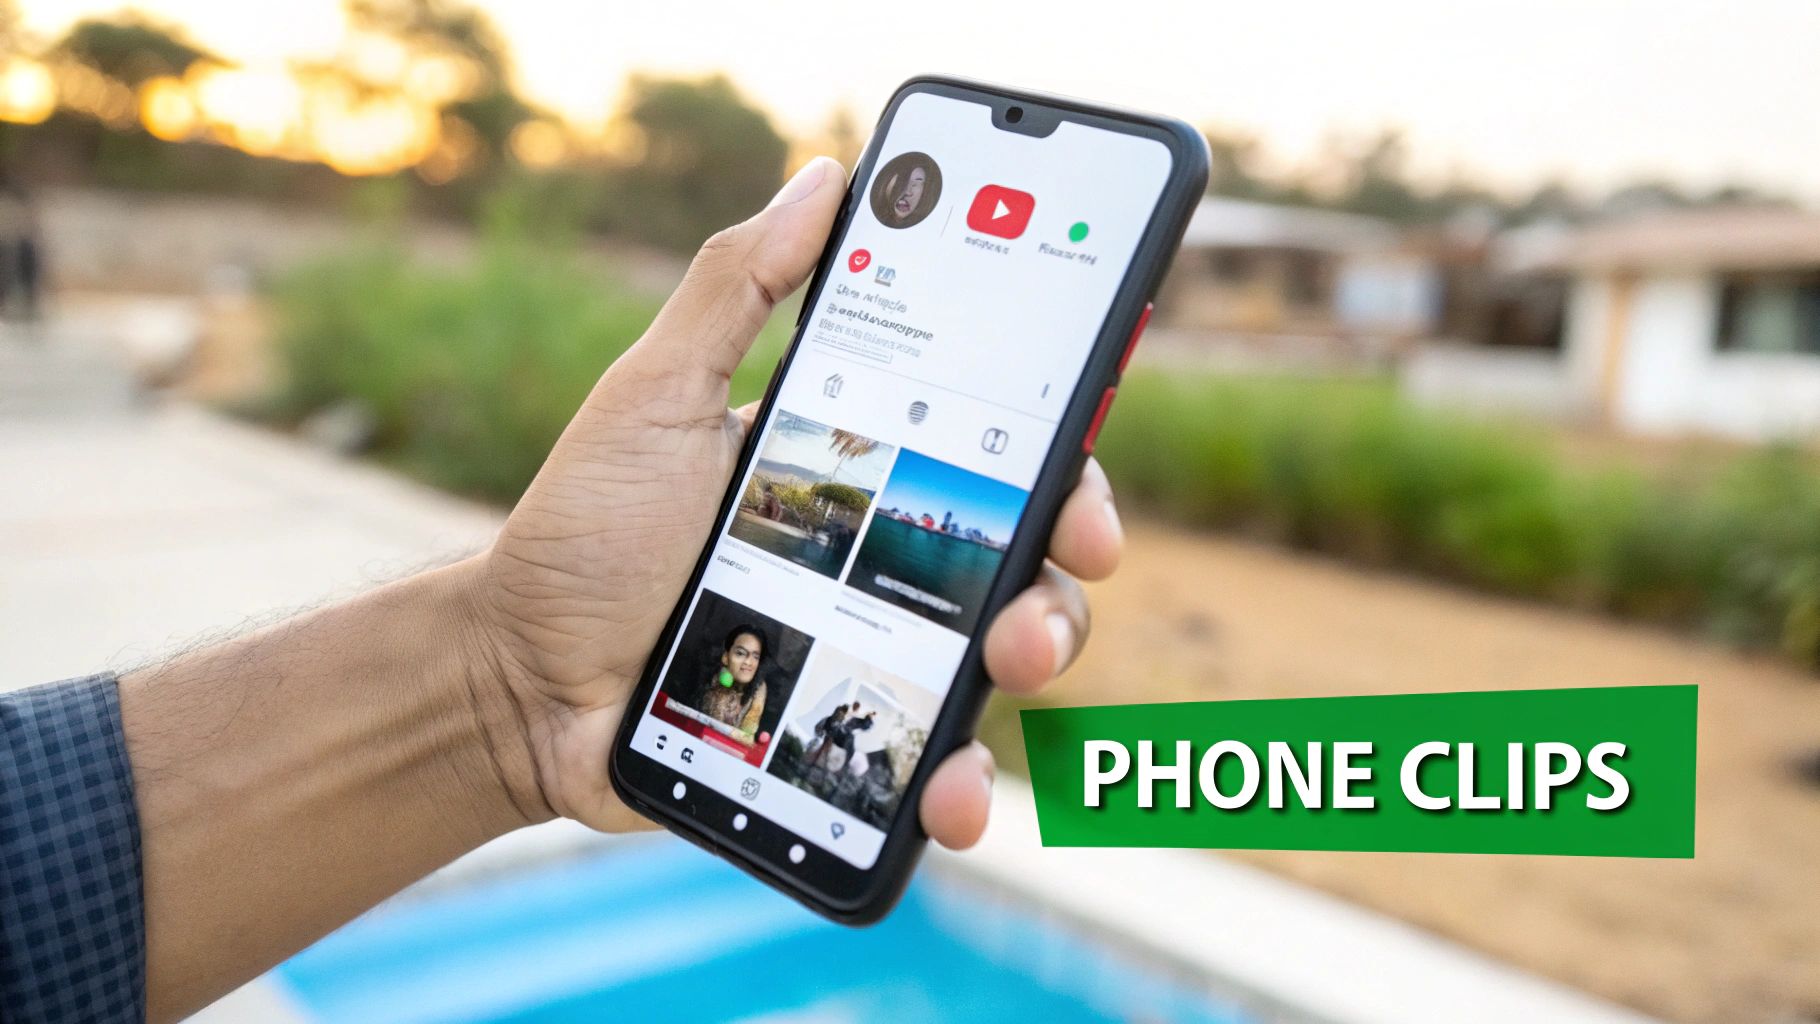
Creating YouTube Clips on Your Phone
Most of us are glued to our phones, so it's no surprise that's where we watch most of our YouTube. Being able to snag a clip right from your device is a must-have skill. Whether you’re on Android or iOS, you've got some powerful tools right in your pocket that can turn your phone into a mobile clipping station—often much faster than on a desktop.
I'm going to walk you through two of the best ways to do this. First, we'll cover using the YouTube app's own 'Clip' feature, which works pretty much the same as it does on your computer. Then, I'll show you a clever workaround using your phone’s built-in screen recorder for those times when clipping is turned off or you just need the actual video file.
Using the YouTube App's Native Clip Feature
The simplest, no-fuss way to create a clip on your phone is to use the feature YouTube built right into its app. It's a really smooth experience designed for quick sharing. Just like on a desktop, you'll spot the "Clip" button—the one with the scissors icon—right below the video player.
Tap that, and the clipping screen pops up. From there, it's pretty straightforward:
- Select your segment: Just drag the handles on the timeline to isolate the exact moment you want to capture, up to 60 seconds long.
- Add a descriptive title: This gives a bit of context to whoever you're sending the clip to.
- Share the clip: The app creates a unique link and gives you options to send it directly to your social media or messaging apps.
This method is perfect when you just want to quickly share a funny moment or a powerful quote with friends without having to download a single extra app.
Screen Recording for Ultimate Flexibility
But what do you do when the "Clip" button is grayed out, or you really need an MP4 file you can save? This is where your phone’s built-in screen recorder becomes your secret weapon. Both iOS and Android have this feature baked right into the system, giving you a foolproof way to capture anything happening on your screen.
For instance, maybe you're watching a cooking tutorial and want to save the 30-second technique for kneading dough, but the creator has disabled clipping. Just fire up your screen recorder, capture that specific part, and it saves directly to your photo gallery for you to watch anytime, even offline.
Pro Tip: Before you start recording, swipe down and turn on "Do Not Disturb" mode. The last thing you want is a notification from your group chat popping up and ruining a perfect take.
Once you’ve got the raw recording, you don't need any fancy software to clean it up. Your phone’s native Photos app (on both iOS and Android) has a basic trimmer. Just open the video, tap "Edit," and drag the sliders to snip off the beginning and end. You're left with just the golden nugget you wanted.
Polishing Your Clips with Mobile Editing Apps
Your phone's built-in trimmer is great for quick cuts, but sometimes you want to add a little more polish, especially if you plan to post the clip on Instagram Reels or TikTok. That's where mobile video editing apps like CapCut or InShot come in handy.
With these apps, it’s incredibly easy to:
- Add text overlays or captions to give more context.
- Crop the video into the perfect aspect ratio for whatever platform you're using.
- Slap on some filters or effects to make the clip pop.
This entire mobile-first workflow—screen record, trim, and polish—gives you total creative control without ever needing a computer. It makes sense, too, since mobile is where the action is. The rise of short-form content like YouTube Shorts is proof of that shift. In fact, a whopping 63% of total YouTube watch time now happens on mobile devices, where clipping and sharing are just a tap away.
By 2025, YouTube's user base is projected to hit 2.7 billion, meaning billions of people have these mobile clipping tools at their fingertips. You can dig into more of these fascinating YouTube user statistics on globalmediainsight.com. This isn't some niche tactic anymore; it's become one of the main ways we all interact with video.
Frequently Asked Questions About Clipping Videos
Once you start pulling clips from YouTube, a few questions are bound to come up. It's just part of the process. This section is your go-to reference for tackling the most common hurdles you'll likely run into.
We're going to clear up the gray areas around copyright, figure out why some features seem to disappear, and give you straight answers to the kind of real-world problems that can slow you down.
Is It Legal to Clip Someone Else’s YouTube Video?
This is the big one, and the answer isn't a simple yes or no. Just downloading and re-uploading someone's work without permission is a quick way to get a copyright strike. But there’s a massive exception: fair use.
In the U.S., the fair use doctrine allows you to use copyrighted material without permission, but only for specific purposes like:
- Commentary and Criticism: Think of reaction videos or reviews where you're actively analyzing a specific segment.
- News Reporting: Using a clip is essential to reporting on a current event.
- Parody: Creating something new and comedic that satirizes the original.
- Education: Showing a clip in a classroom or an educational video to illustrate a point.
The secret to staying on the right side of fair use is to be transformative. You have to add something new—a fresh perspective, new information, or a different meaning. Don’t just repost; add your own unique value.
Why Is the YouTube Clip Button Sometimes Missing?
Ever been ready to grab a great moment only to find the "Clip" button has vanished? It’s not a bug. The creator has full control over this feature and can disable it for their channel or specific videos.
There are a few common reasons why a creator might turn it off:
- Content is "Made for Kids": YouTube automatically disables clipping and other features on videos designated for children to comply with privacy laws.
- Preventing Misinformation: Creators in sensitive fields like news, science, or politics might disable it to stop their content from being sliced up and taken out of context.
- Copyright Protection: Musicians, movie studios, and other rights holders often turn it off to protect their intellectual property.
If that button is gone, you'll have to fall back on one of the other methods, like a browser extension, a third-party downloader, or screen recording.
Can I Monetize Videos That Contain Clips from Others?
You can, but you have to walk a very fine line. To make money from a video that includes someone else's content, your work must be a shining example of fair use. The YouTube Partner Program has incredibly strict policies on this.
Slapping together a compilation of "funny moments" with no original input from you is almost guaranteed to be demonetized. But a deep-dive video essay that uses short, relevant clips to support a larger, original argument? That has a much better shot.
It all comes down to the value you add. If the clip is the main event, you're in trouble. If your commentary and analysis are the main event, you're in a much stronger position.
What Is the Best Video Format for Clips?
For pretty much any use case you can think of, MP4 is the undisputed champion. It delivers that sweet spot of high quality and reasonable file size, and it's compatible with virtually every video editor, social media site, and device out there.
When you use online downloaders or extensions, MP4 will almost always be the default (and recommended) option.
The only time you'd really consider something else is for a very specific need. For instance, a GIF is perfect if you want a short, silent, looping animation to drop into a blog post or a forum comment.
How Long Can a YouTube Clip Be?
The length of your clip is completely dictated by the tool you use to create it. Each method has its own rules.
- YouTube's Native Clip Feature: This one is rigid. You can only create clips that are between 5 and 60 seconds long. No more, no less.
- Third-Party Tools (Extensions, Downloaders): These tools don't have built-in time limits. You can clip a 10-second soundbite or a 10-minute segment.
- Downloading and Editing: Here, you have total freedom. Since you're working with the full video file, your clip can be as long or as short as you need it to be.
Ultimately, your goal should determine the method. A quick share on social media? 60 seconds is plenty. A detailed breakdown for your own video? You'll want the flexibility of downloading and editing yourself.
