A structured process is what separates creative chaos from predictable success. The video production workflow is essentially a three-stage system—pre-production, production, and post-production—that shepherds a project from a raw idea all the way to the final cut. Think of it as your trusted recipe for cooking up compelling video content, consistently and efficiently.
Your Blueprint for an Efficient Video Workflow
In a world where visual content reigns supreme, a solid workflow turns video creation from a scary, overwhelming task into a manageable, step-by-step roadmap. It makes sure every single action, from the first brainstorm to the final upload, has a clear purpose, saving you a ton of time, money, and creative burnout.
And this systematic approach isn't just for big-budget studios. It’s absolutely vital for independent creators, marketers, and businesses of any size. The global video production market was valued at around USD 70.40 billion in a recent year and is expected to explode to USD 746.88 billion by 2030. That's a massive surge, and it shows just how critical an efficient process has become for anyone in the content game.
The Core of the Workflow
At its heart, the workflow is just a project management framework specifically built for visual storytelling. It breaks down a huge, complex undertaking into smaller, more digestible phases, which makes the whole thing feel way less intimidating. Nailing down this blueprint is crucial, and truly mastering project management principles provides a strong foundation for getting things done right.
To get a clearer picture, let's break down the process into its three fundamental stages.
The Three Core Stages of Video Production
This table outlines the essential phases of any video project, from initial planning to the final polished product.
| Stage | Objective | Key Activities |
|---|---|---|
| Pre-Production | Plan everything meticulously before filming begins. | Concept development, scriptwriting, storyboarding, location scouting, casting, scheduling. |
| Production | Capture all the visual and audio elements. | Filming B-roll, recording interviews, capturing audio, setting up lighting. |
| Post-Production | Assemble, refine, and polish the raw footage. | Editing, color grading, sound mixing, adding graphics and effects, final export. |
Each of these stages builds on the last, creating a logical flow that prevents costly mistakes and ensures a high-quality outcome.
This image really drives home how it all starts—with the critical planning that happens long before you ever hit "record."
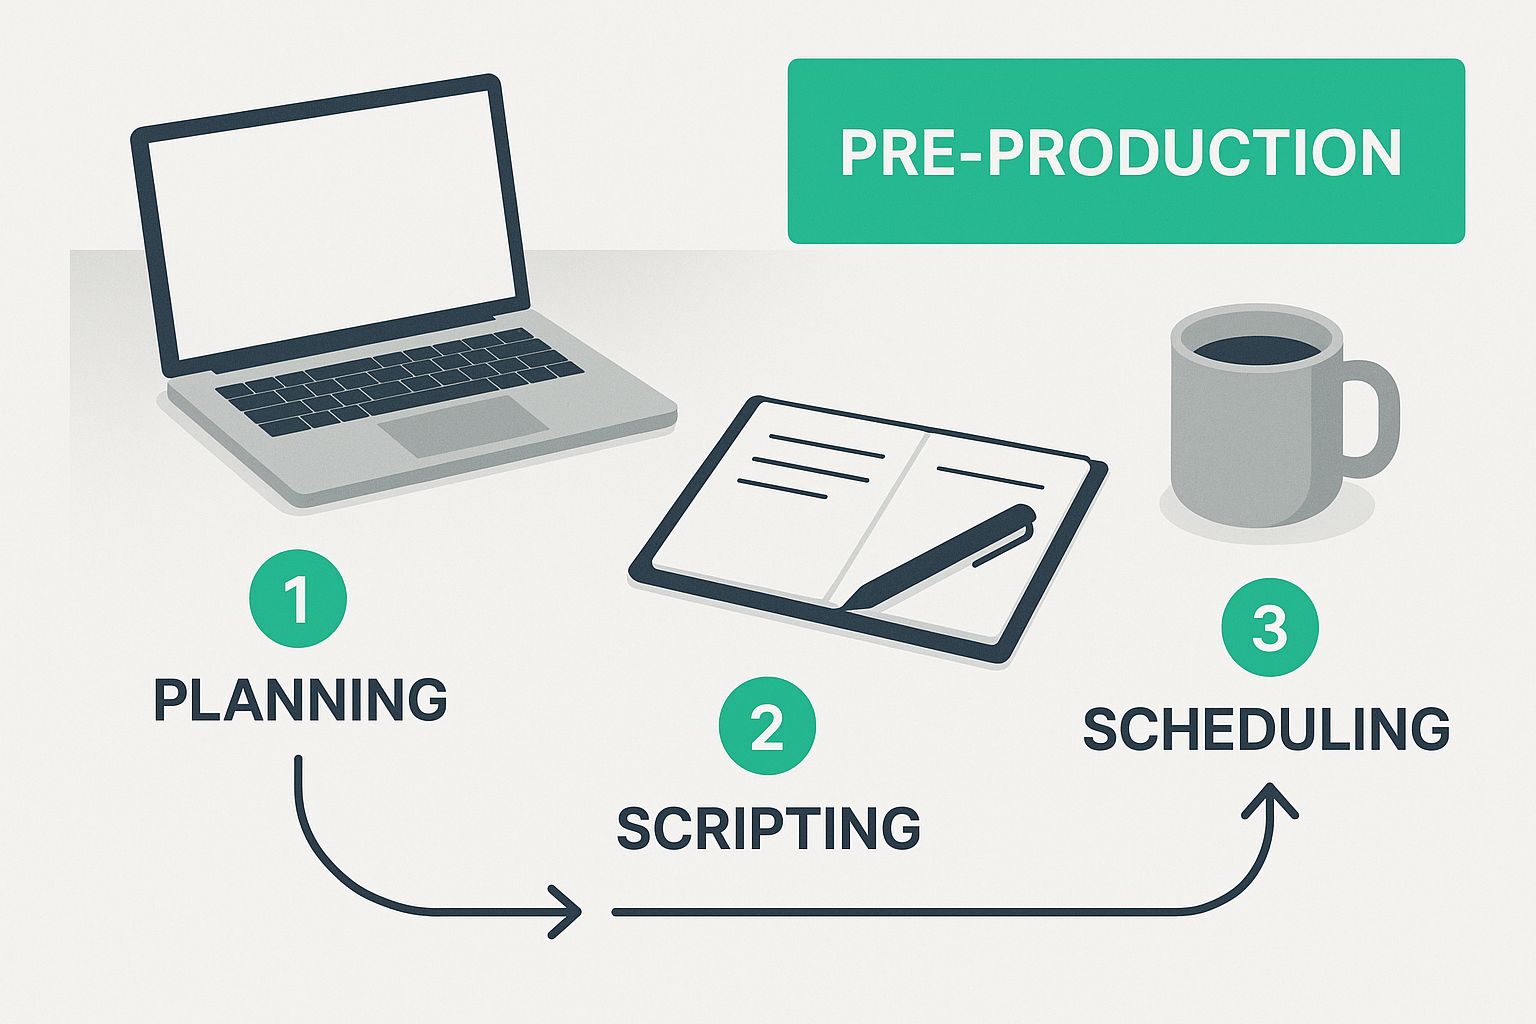
As you can see, the foundation of any great video is poured during pre-production. Rushing this step is a recipe for disaster, often leading to expensive reshoots and creative compromises you'll regret later.
By dedicating ample time to the pre-production phase, you are essentially creating an insurance policy for your project. It’s where you solve problems on paper, not on a costly film set with a full crew waiting.
Ultimately, a strong video production workflow brings structure, accountability, and a clear path forward. It's what empowers you to take a brilliant idea and transform it into a polished final product that truly connects with your audience and hits your goals.
Laying the Foundation in Pre-Production
Every great video you've ever seen was built on a foundation the audience never gets to see. This is the first, and arguably most important, stage of the entire video production workflow: pre-production. It's where the real magic happens, long before a camera is even turned on.
Think of it like an architect drafting meticulous blueprints before a single brick is laid. Skipping this step is a recipe for chaos, blown budgets, and creative dead-ends. All the problems you solve on paper during pre-production are problems you don't have to solve on set, with an entire crew waiting and the clock ticking. It’s the secret to a smooth, efficient shoot that actually brings your vision to life.
From Concept to Concrete Plan
It all starts with a simple idea. What's the point of this video? Are you trying to teach something, make people laugh, sell a product, or just get your brand's name out there? Nailing down this single purpose is your North Star—it will guide every decision you make from here on out.
Once you know why you're making the video, it's time to write the script. A good script is more than just dialogue; it sets the tone, controls the pacing, and maps out the emotional journey you want your audience to take.
This is also where you have to be realistic about the scale of your project. The demand for new video content is absolutely massive. In a recent year, producers pumped out 9,511 films globally. That's a staggering 68% jump from the pandemic lulls and even a 2% increase over pre-pandemic numbers. With that much competition, having a rock-solid plan isn't just a good idea—it's essential. You can dive deeper into these numbers with global film production statistics from WIPO.
Visualizing Your Story Before You Shoot
With a script locked in, you have to start thinking visually. How do you turn those words on a page into actual moving pictures? This is where storyboards and shot lists come in, and they are your absolute best friends.
- Storyboards: Think of these as a comic book version of your video. They're rough sketches of each key moment, showing how a scene will be framed. This gets everyone on the same page, from the director to the camera operator, so there are no surprises on shooting day.
- Shot Lists: This is the nitty-gritty checklist for the camera team. It details every single shot you need to get, specifying the angle, shot size (like a wide shot or a close-up), any camera movement, and what gear is needed. It’s your technical roadmap for the shoot.
A detailed shot list is your best defense against that sinking feeling in the edit bay when you realize you missed a crucial shot. It forces you to think through the entire video, shot by shot, so you walk away from the set with everything you need.
Assembling Your Resources
The last piece of the pre-production puzzle is all about logistics. This is where your abstract plan crashes into reality, and you start putting people, places, and gear on a calendar.
Key Logistical Tasks:
- Location Scouting: Finding and locking down the perfect spots that fit the look and feel of your script.
- Casting: Choosing the right on-screen talent who can bring your message to life and connect with your audience.
- Crew Assembly: Hiring the technical pros—the director of photography, the sound mixer, the gaffer—who have the skills to pull off your vision.
- Gear and Props: Renting or buying all the cameras, lenses, lights, mics, and props needed for every scene.
- Scheduling and Budgeting: Building out a detailed day-by-day schedule and a line-item budget to keep the whole thing on track and on budget.
By the time you're done with this phase, you should have a "production binder" (whether it's a real binder or a folder on your computer) stuffed with your script, storyboards, shot lists, schedules, permits, and contact info. This level of planning is what separates the pros from the amateurs and sets the stage for a shoot that’s successful, not stressful.
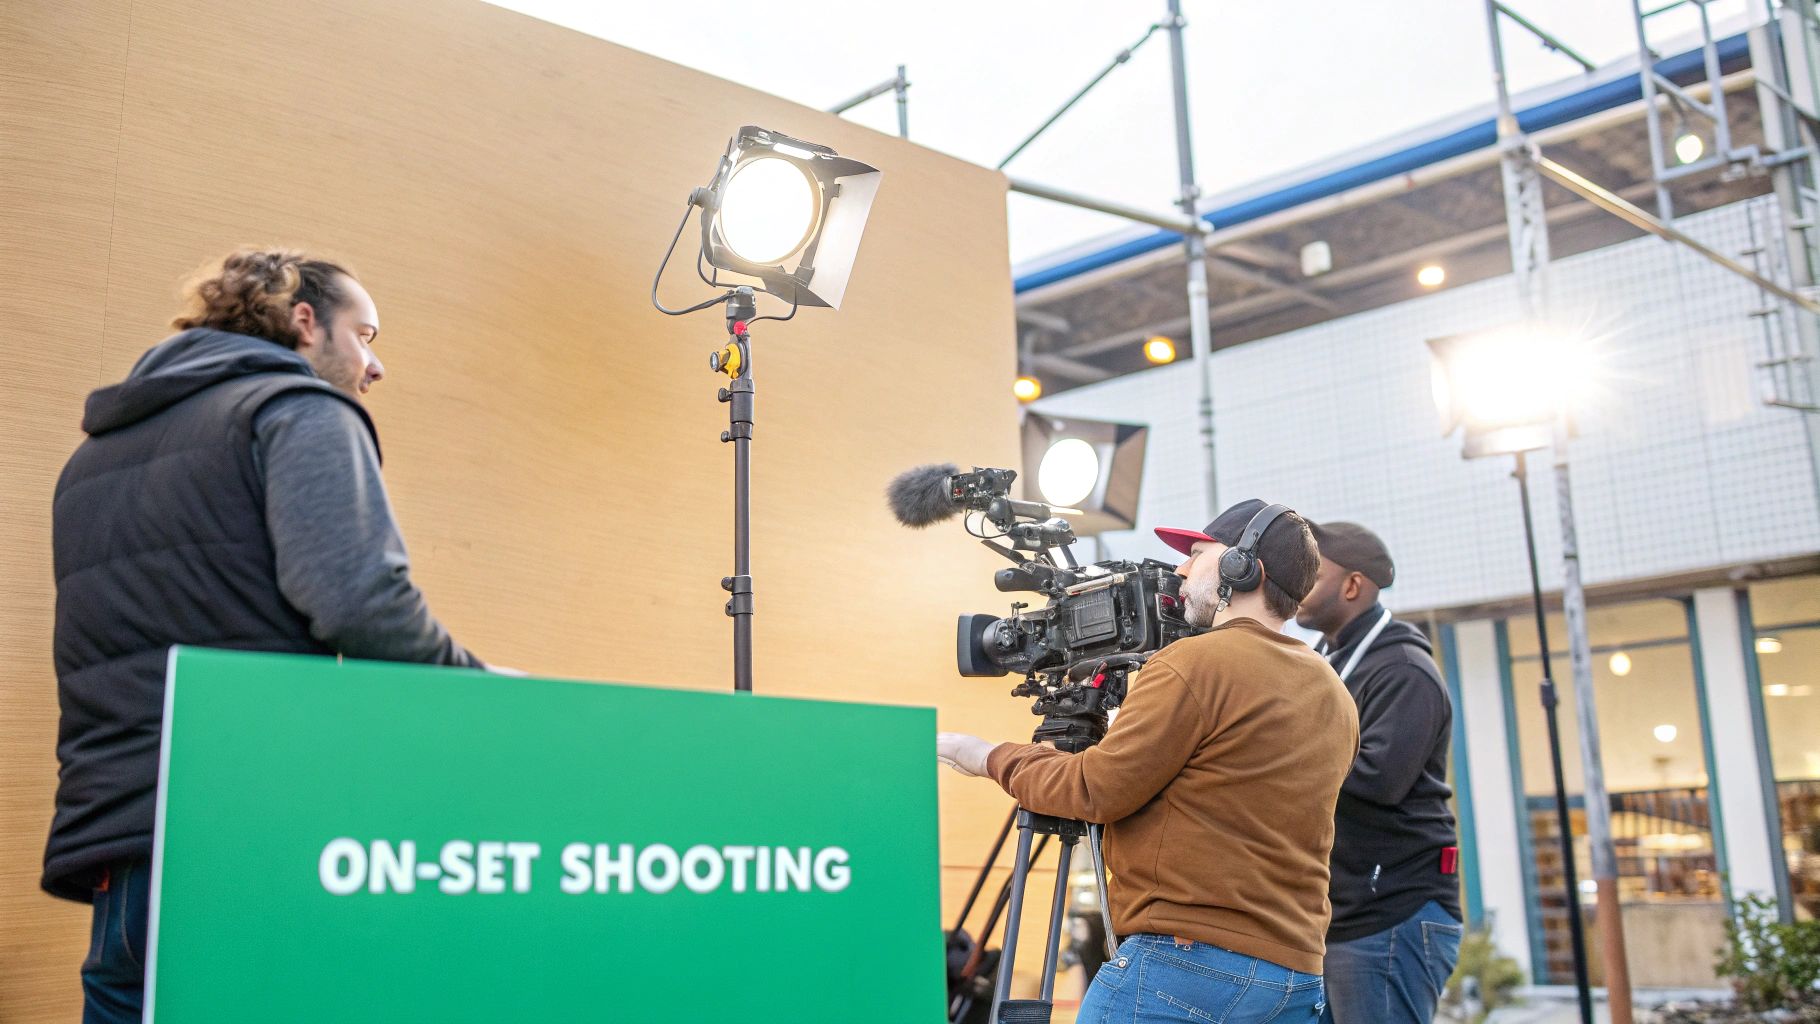
2. Bringing Your Vision to Life During Production

This is where all that meticulous planning from pre-production finally pays off. The production stage is the exhilarating, hands-on process of capturing every visual and audio element that will eventually become your final story. It’s the classic "lights, camera, action!" moment where your blueprint meets the real world.
Success on set is a delicate balancing act. You have to be disciplined enough to stick to your shot list and script, but also flexible enough to spot and capture those unscripted, spontaneous moments of magic. The real goal is to leave the set with every single frame you need, giving your post-production team a treasure trove of high-quality footage to shape.
Setting the Scene and Capturing Sound
Before the cameras even start rolling, the crew gets to work creating the perfect environment. This isn’t just about making a location look pretty; it's about building the specific atmosphere your story needs. Lighting is your most powerful tool here.
- Key Light: This is your primary, brightest light source, designed to highlight your subject.
- Fill Light: A softer light that fills in the shadows cast by the key light, which helps reduce harsh contrast.
- Backlight: Placed behind your subject, this light separates them from the background, adding a professional polish and a sense of depth.
At the same time, capturing crystal-clear audio is completely non-negotiable. Viewers are far more forgiving of slightly imperfect video than they are of muffled, distorted, or hard-to-hear sound. Using a dedicated boom operator or high-quality lavalier mics is essential for clean dialogue and minimizing distracting background noise.
The most beautifully shot scene can be instantly ruined by bad audio. Always prioritize sound recording on set; your editor (and your audience) will thank you for it.
Mastering On-Set Operations and Direction
Running a smooth set is a craft in itself. The director and assistant director (AD) are the conductors of this orchestra, keeping the entire production on schedule and making sure the cast and crew move efficiently from one shot to the next. This requires sharp communication, quick problem-solving, and a constant eye on the clock to avoid expensive overtime.
Directing talent is all about coaxing authentic, compelling performances that ring true to the script. It’s a process of building trust and giving clear, actionable feedback to help actors deliver their absolute best. This human connection is what will ultimately resonate with your audience on an emotional level.
For a smoother process, it helps to know which team members handle what. Here's a quick look at some essential roles on set.
Essential Production Roles and Responsibilities
| Role | Primary Responsibility | Key Contribution |
|---|---|---|
| Director | Oversees the creative vision and guides actor performances. | Ensures the final product aligns with the intended story and tone. |
| Director of Photography | Manages the camera and lighting crews to create the visual style. | Translates the director's vision into a tangible look and feel. |
| Sound Mixer | Records all on-set audio, ensuring clarity and quality. | Captures clean dialogue and ambient sound, which is vital for post-production. |
| Gaffer | Head of the electrical department, responsible for executing the lighting plan. | Shapes the mood and atmosphere of each scene through lighting. |
| Grip | Manages non-electrical equipment that supports the camera. | Builds the physical infrastructure (rigs, dollies) for camera movement. |
Having a clear understanding of these roles helps everyone stay in their lane and work together seamlessly.
On a broader scale, industry trends can directly impact these on-set realities. For example, in early 2025, the global film and television industry experienced a 10% dip in production volume. While the Asia-Pacific region saw a significant 35% drop, the Americas actually showed market stability with an 8% increase, highlighting how regional economics can influence day-to-day production.
If you're looking to streamline your workflow after the shoot, our guide on automating video editing tasks can show you how to save precious time in post-production. And for those exploring new creative avenues, the best AI video generators are opening up possibilities that can sometimes reduce the need for extensive on-location shoots altogether.
Ultimately, the production phase is a controlled whirlwind of technical skill and creative collaboration, all pointed toward one goal: capturing the raw ingredients needed to tell an unforgettable story.
3. Crafting the Story in Post-Production
If production is all about gathering the raw ingredients, then post-production is where the magic really happens in the kitchen. This is the stage where all those scattered clips, audio files, and rough ideas finally come together to become a cohesive, compelling story. The entire video production workflow pivots on this crucial phase, turning a hard drive full of assets into a polished video that actually connects with your audience.
The whole thing kicks off with a bit of housekeeping. An editor’s first, and arguably most important, job is to wade through what could be hours of footage. They’ll be labeling clips, syncing up audio, and building a structured library. Think of it as mise en place for video editing—it prevents total chaos later and makes grabbing that perfect shot a breeze.
With everything in its right place, the editor can start building the rough cut. This is the first real attempt at telling the story, where the main shots are laid out in sequence to get a feel for the narrative flow and pacing. It won't be pretty, but it’s the skeleton that everything else will be built upon.
Refining the Narrative and Enhancing the Visuals
Once the rough cut has established the story's basic bones, the real artistry begins. This is where an editor gets into the nitty-gritty, trimming clips with frame-by-frame precision, perfecting the timing of each cut, and making sure the video just flows from one moment to the next.
A huge part of this refinement process is color correction and grading.
- Color Correction: This is the technical, "fix-it" part of the job. It’s all about adjusting the exposure, getting the white balance right, and ensuring colors look natural and consistent from one shot to the next. No weird, sudden shifts in tone.
- Color Grading: Now for the fun, creative part. This is where the editor manipulates color to create a specific mood. Think warm, golden tones for a nostalgic scene, cool blues for a more somber moment, or high-contrast, saturated colors for an energetic, action-packed sequence.
This is where your video really finds its visual personality. The right color grade can completely change how an audience feels the story, adding a layer of emotional depth that the visuals alone could never achieve.
Post-production is often where a video truly finds its voice. It’s a delicate balance of technical skill and creative intuition, where problem-solving meets storytelling to shape the final product.
The tools you pick can make a world of difference here. As you’re crafting your story, the right editing suite is non-negotiable. For more specialized footage, you might even explore different drone video editing software options to properly handle unique aerial shots and stabilization needs.
Building an Immersive Soundscape
Let’s be honest: visuals are only half the battle. Sound design is what separates the amateur videos from the professional ones, making the experience feel truly immersive. A polished soundscape can guide your audience's emotions and add a layer of realism that’s felt just as much as it's heard.
This process usually involves a few key steps:
- Dialogue Editing: This means cleaning up all the spoken audio. You’ll be removing distracting background noise, balancing volume levels, and making sure every single word is crisp and clear.
- Adding Sound Effects (SFX): Here, you’ll layer in subtle environmental sounds—things like footsteps on gravel, the distant hum of a city, or leaves rustling in the wind—to make the world of the video feel more tangible.
- Music Integration: This is all about choosing and mixing a musical score that complements the video’s pacing and emotional journey. It’s knowing exactly when to swell the music to build tension and when to pull it back for a quiet, intimate moment.
When all these elements come together, they create a rich auditory experience that pulls the viewer right into the story. Bad sound is an instant giveaway of an amateur video, but a well-executed sound mix can elevate your work to a completely different level.
The Finishing Touches with Graphics and AI
The final layers of polish come from motion graphics and text overlays. This could be anything from animated lower-thirds that introduce a speaker to custom title cards or a call-to-action that guides the viewer on what to do next. These elements help reinforce your branding and make key information crystal clear.
This is also where modern AI tools, like our very own TimeSkip, can be a massive game-changer for the post-production workflow. Manually creating chapters for long videos or transcribing dialogue are the kinds of tedious, time-sucking tasks that editors dread. AI-powered chaptering tools can analyze your video and generate optimized timestamps in seconds, freeing up your editor to focus on the creative, high-impact decisions that really matter.
By automating these repetitive tasks, you can get projects done faster and dedicate more energy to the storytelling elements—like color, sound, and pacing—that will truly make your video stand out. This blend of human creativity and AI efficiency is what defines the modern post-production process.
Getting Your Video Seen Through Distribution
 You've done it. You poured your heart, soul, and a whole lot of caffeine into creating a fantastic video. But here's the hard truth: the video production workflow isn't over just because you hit "export."
A brilliant video without an audience is like a stand-up comic telling jokes to an empty room. The final, and arguably most critical, phase is all about getting it out there. This is where distribution and promotion turn all your hard work into actual results.
Simply uploading your video and hoping for the best is not a strategy. Real success comes from a deliberate launch plan that gets your video in front of the right eyeballs, on the right platforms, and at just the right time. This is how you build momentum and give your masterpiece the fighting chance it deserves.
Choosing the Right Distribution Channels
Before you even think about posting, take a step back and ask: where does my audience actually hang out online? A "spray and pray" approach where you blast your video everywhere will only dilute its impact. You need to focus your energy where it counts.
Is your content educational and in-depth? YouTube is your mothership, a powerful search engine built for exactly that. Is your video a quick, visually punchy clip designed to stop a scroll? Instagram Reels and TikTok are your best friends for that kind of short-form, vertical content. And if you're talking B2B or sharing professional insights, LinkedIn is the place to find a targeted, business-minded audience.
A common rookie mistake is treating every platform like it's the same. Each has its own vibe, its own formatting rules, and its own user expectations. The goal is to make your video feel native, like it truly belongs on the platform where people are watching it.
This means you’ve got to tailor your content. That beautiful, cinematic 16:9 video is perfect for YouTube, but it needs to be recut into a vertical 9:16 clip to stand a chance on TikTok. You might even create a square version with bold, burned-in captions to grab attention in a crowded LinkedIn or Facebook feed.
This isn't just extra work; it's a core part of a smart content strategy. To get more ideas on wringing every last drop of value from your video, you can explore different content repurposing strategies that turn a single shoot into a full-blown, multi-platform campaign.
Optimizing Your Video for Search and Discovery
Once you've picked your primary platform—and for most long-form content, that's YouTube—you need to start thinking like a search engine. Video SEO is the art of helping the platform understand what your video is about so it can serve it up to the right people. This means dialing in a few key elements.
Essential Video SEO Components:
- A Killer Title: Your title needs to do two things: be irresistibly clickable and be packed with the right keywords. It should spark curiosity while clearly spelling out the video's value.
- A Detailed Description: The first few lines are prime real estate. Summarize the video and drop in your main keyword right away. Use the rest of the space to add more context, link out to resources, and sprinkle in related secondary keywords.
- Strategic Tags: Think of tags as your video's DNA. Use a mix of broad terms (like "video marketing") and super-specific ones (like "how to color grade in DaVinci Resolve"). What would your ideal viewer type into the search bar? Put that here.
- A Custom Thumbnail: Let's be honest, the thumbnail is often the #1 reason someone clicks. A high-quality, eye-catching thumbnail should be bright, feature an expressive face if possible, and use minimal text that hooks the viewer and complements the title.
Executing a Strategic Launch Plan
Your promotion shouldn't feel like a last-minute scramble. A coordinated launch can create a surge of initial views, which is a massive signal to the platform's algorithm that you've got something good on your hands.
Here’s a simple but powerful launch checklist to follow:
- Schedule the Premiere: Use YouTube's Premiere feature. It builds hype, creates a live event-like atmosphere, and gets your subscribers buzzing.
- Tease It Everywhere: A day or two before the launch, start teasing the video on your other social accounts. Post a juicy clip or a behind-the-scenes still and direct your followers to the upcoming premiere.
- Engage with Early Comments: For the first few hours after your video goes live, be present. Jump into the comments, answer questions, and thank people for watching. This builds an instant sense of community.
- Hit Your Email List: If you have an email newsletter, you have a direct line to your biggest fans. It's one of your most powerful promotional tools, so send a dedicated email letting them know your new video is live.
By blending platform-specific tweaks with solid SEO and a coordinated launch, you ensure your video doesn't just get published—it gets seen. This is the final step that completes the workflow and delivers a real return on all your creative effort.
5. Measuring Success and Optimizing Your Strategy
Hitting "publish" isn't the finish line. Far from it. This is where your video production workflow actually loops back on itself, kicking off a cycle of continuous improvement. Now, you get to analyze your video’s performance to make sure the next one you create is even better.
Think of it like a chef tasting a new dish after it's served. You're watching for reactions, seeing what parts people loved, and noticing what they left on the plate. That feedback is absolutely essential for perfecting the recipe next time—and video analytics give you that exact same opportunity.
Decoding Viewer Behavior with Key Metrics
To figure out what's really clicking with your audience, you have to look beyond a simple view count. The real story is hiding in the deeper engagement metrics that show you how people are truly interacting with your content. Platforms like YouTube Studio are a goldmine for this kind of data.
You’ll want to zero in on a few core metrics:
- Audience Retention: This is arguably the most important metric of all. The retention graph shows you, second by second, what percentage of your audience is still watching. It pinpoints exactly where viewers are most engaged and, crucially, where they’re dropping off.
- Watch Time: This is the total number of minutes people have spent watching your video. It's a massive signal to the algorithm that your content is valuable and knows how to hold someone's attention.
- Click-Through Rate (CTR): This number tells you what percentage of people who saw your video's thumbnail and title actually clicked to watch. If your CTR is low, it’s a good sign that your title or thumbnail isn't doing its job.
By digging into your audience retention curve, you can spot powerful patterns. Are viewers constantly skipping your long intro? Do they re-watch a specific, helpful segment over and over? This feedback is pure gold for structuring future videos.
These data points offer a direct, unfiltered look into your audience's mind. They tell you what kind of content connects, which storytelling tricks work, and what topics make people curious.
Turning Insights into Actionable Strategy
Once you've got the data, it's time to put it to work. Don't just let the numbers sit in a report; use them to build a smarter, data-driven foundation for everything you create from here on out. This is how you stop guessing and start refining your storytelling to consistently produce videos that perform.
For example, if you see a major viewer drop-off within the first 30 seconds, your next video needs a much stronger, more immediate hook. If a certain segment has a high re-watch rate, that's a blinking neon sign telling you to create more in-depth content on that exact topic.
Getting comfortable with these metrics is crucial for growth. For a much deeper dive, our guide on how to read and understand YouTube analytics can explain the specific reports you should be watching. This cycle of creating, measuring, and optimizing is the engine that will power your video strategy for the long haul.
Frequently Asked Questions About Video Production
Stepping into video production for the first time can feel like you're tiptoeing through a field of tripwires. To help you dodge the common pitfalls, we've put together answers to the questions we hear most often from creators building out their workflow. Think of this as a cheat sheet to help you plan smarter and hit record with confidence.
How Do I Create a Realistic Budget for My Video Project?
The secret to a solid budget is breaking it down from the very beginning. Think of your project in its three big phases: pre-production, production, and post-production. Jot down every single thing you might have to pay for, from scriptwriting and location scouting in pre-pro, to crew, actors, and gear rentals during the shoot. Don't forget post-production costs like editing software, music licensing, and motion graphics.
Once you have your list, do a little homework on the going rates for these things in your area. It's always a good idea to get a few different quotes. Most importantly, whatever your final number is, add a 10-15% contingency on top. This isn't just padding; it's your safety net for those curveballs that every project inevitably throws.
If you have to choose where to spend, put your money where viewers will notice it most. Crystal-clear audio and great lighting make a much bigger difference to how "professional" your video feels than the brand of camera you're holding.
What Is the Most Common Mistake Beginners Make?
Hands down, the biggest and most expensive mistake new creators make is rushing—or worse, completely skipping—the pre-production phase. I get it, the excitement to start shooting is real. But diving in without a plan is a surefire recipe for a chaotic, disorganized shoot.
When you don't have a plan, you end up with missed shots, a story that doesn't quite hang together, and a post-production process that becomes a nightmare. You'll waste countless hours in the editing room trying to salvage things that a simple shot list or a locked-in script would have easily prevented. A good plan isn't just a document; it's your most valuable piece of equipment.
Do I Need Expensive Camera Gear to Start?
Absolutely not. That camera you have in your pocket right now is probably more than powerful enough to get started. Modern smartphones can capture fantastic 4K video, and when you combine that with good lighting and clear audio, you can create truly professional-looking content.
Instead of dropping a ton of cash on a fancy camera body, focus your initial investment on two things that have a much bigger impact:
- A Quality Microphone: Viewers will forgive a slightly grainy shot, but they will click away instantly for bad audio. A simple lavalier or shotgun mic will immediately make your videos sound a hundred times better.
- A Basic Lighting Kit: You don't need a Hollywood setup. A simple three-point lighting kit can take a shot from looking flat and amateur to dynamic and polished.
You can always rent more specialized cameras and lenses for specific projects as you grow. Nail the fundamentals of light and sound first. Get those right, and you're already halfway there.
Ready to dramatically speed up your post-production? TimeSkip automates YouTube chapter creation in seconds, optimizing your videos for better SEO and viewer retention. Get your two free video generations and see the difference at https://timeskip.io.
