You can snip clips from YouTube videos using the platform's own "Clip" feature for short bits, or you can turn to third-party tools when you need longer clips and more download options. The native tool is great for a quick grab, but external apps give you a lot more power and flexibility.
Why Clipping YouTube Videos Is a Modern Superpower
Learning how to clip YouTube videos is more than just saving a funny moment. It's a genuine superpower for modern creators, marketers, and educators. A perfectly chosen clip can take a long, rambling video and turn it into a sharp, shareable asset that gets people talking.
Just picture it: marketers grabbing a powerful testimonial for a social media ad, or teachers isolating a key concept from an hour-long lecture. This is all about making content easier to digest and far more impactful in a world where attention spans are short.
The Power of Repurposing Content
The real magic kicks in when you slice up one long video into ten or more pieces of micro-content. This is one of the smartest content repurposing strategies out there because it lets you multiply your reach without having to constantly film new stuff. Viral Shorts, killer Instagram Reels, and insightful TikToks? They often start their life as a small segment of a bigger YouTube video.
This whole approach is fueled by YouTube's massive audience. The platform is on track to hit 2.7 billion global users by 2025—a huge jump from just 0.8 billion back in 2012. With over 500 hours of content being uploaded every single minute, being able to find and pull out the best moments is what helps you cut through the noise.
Key Takeaway: Clipping isn't just about making things shorter; it's about making your message louder. By extracting the most compelling moments, you can tap into new audiences on other platforms and give your engagement a serious boost.
Once you have your clips ready, you’ll probably wonder how to post YouTube videos on Instagram and other social channels to squeeze every drop of value out of them. Now that you see the "why" behind it, let's get into the "how" of making it happen.
Using YouTube’s Built-In Clip Feature
Sometimes, you just need to grab a quick moment from a YouTube video. Maybe it’s a killer quote for your blog post or a hilarious fail you want to text to a friend. For those quick-and-dirty jobs, YouTube’s own clipping tool is your best bet. It’s built right into the video player, so there’s no extra software to download or install.
Just look for the "Clip" button—it’s the one with the little scissors icon. You’ll usually find it right under the video player, nestled between "Share" and "Download." If you don't see it, don't panic. The creator might have turned the feature off for that specific video, or the content might be flagged as "Made for Kids," which automatically disables clipping.
This simple breakdown shows just how straightforward the process is.
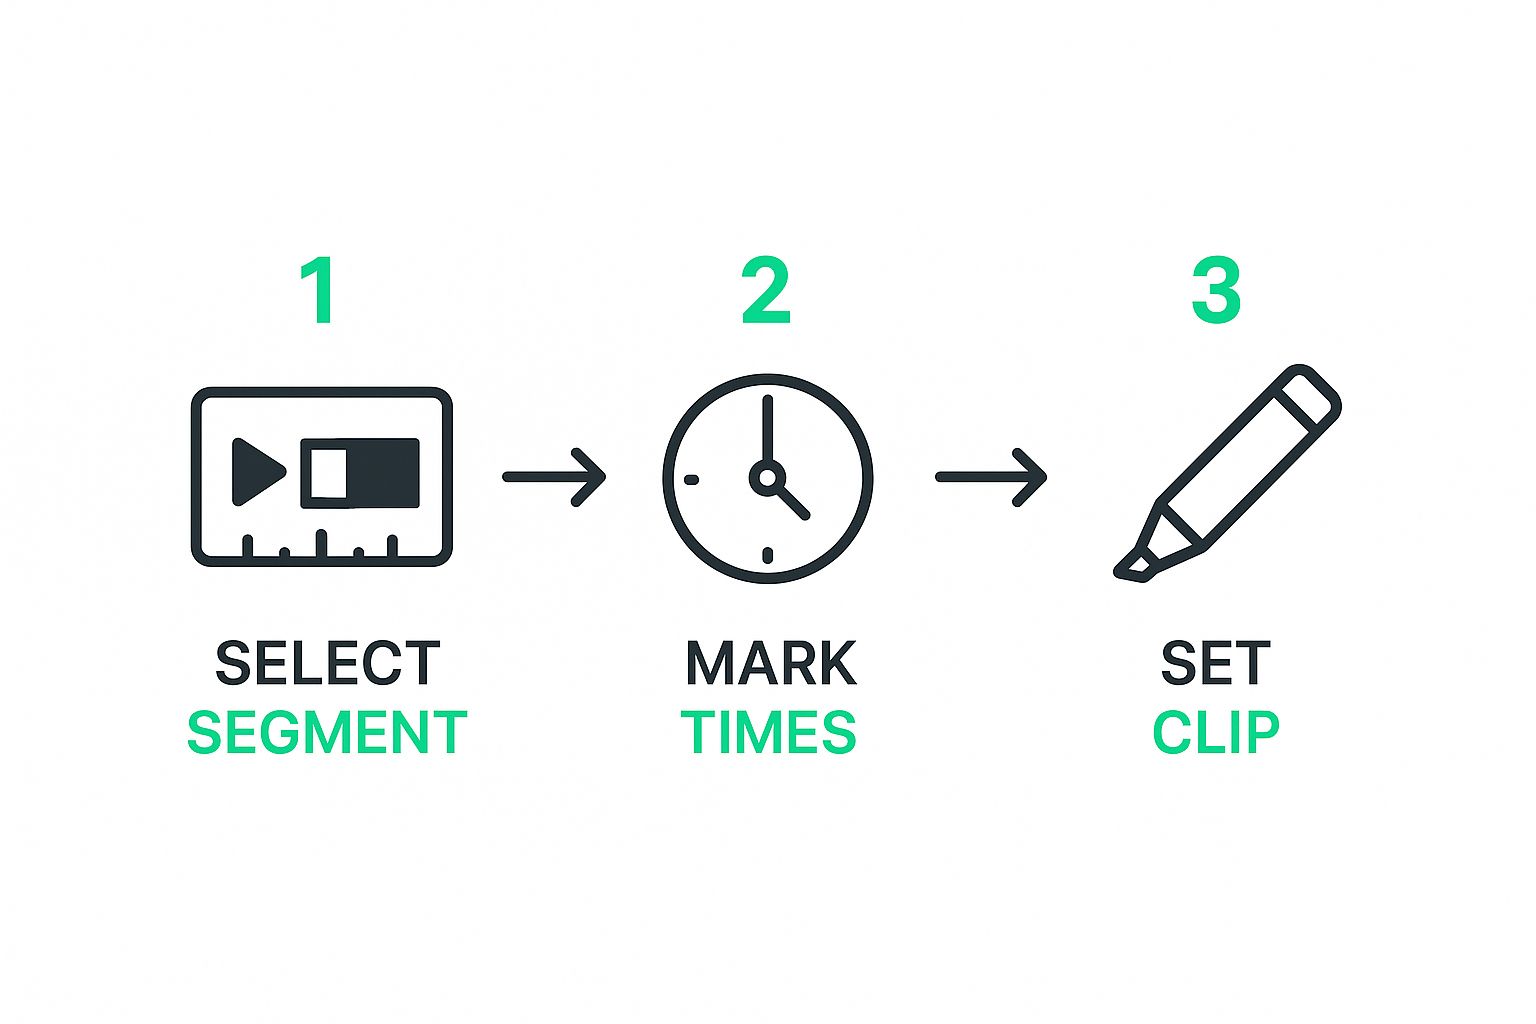
As you can see, it’s a quick journey from finding your favorite part to sharing it with the world.
How To Create Your Clip
Once you hit that "Clip" button, a small editing box will pop up. This is where the magic happens. A slider appears over the video's timeline, and you can just drag the handles to pinpoint the exact segment you want to capture. You have full control over the start and end times.
The biggest catch is the length. YouTube keeps these clips short and sweet: they have to be between five and 60 seconds long. This is perfect for short highlights but won't work if you need to grab a longer section.
After you've selected your segment, give your clip a descriptive title (you’ve got up to 140 characters to work with) and then click "Share clip."
One thing I always tell people is that sharing a clip doesn't create a separate video file. It generates a unique URL that loops your chosen segment right from the original video. This is great because the original creator still gets full credit and view counts.
From there, a sharing menu gives you a bunch of options to get your clip out there:
- Copy the link and paste it wherever you want.
- Embed the clip directly on your website or blog.
- Share it on social platforms like Facebook or Twitter.
- Email it directly to someone.
The whole process is designed for convenience, making it the perfect tool for casual, on-the-fly sharing.
YouTube Native Clip Tool Pros and Cons
So, is YouTube's built-in tool the right choice for you? It really depends on what you need. I put together this quick table to help you decide.
| Feature | Pros | Cons |
|---|---|---|
| Accessibility | Built directly into the YouTube player—no downloads needed. | Can be disabled by creators or is unavailable for "Made for Kids" content. |
| Ease of Use | Extremely simple and intuitive; just click, drag, title, and share. | Lacks advanced editing features like trimming, merging, or adding text. |
| Clip Length | Perfect for short, shareable moments (up to 60 seconds). | Not suitable for creating clips longer than one minute. |
| Sharing Options | Offers multiple direct sharing options (social, email, embed, link). | Doesn't download a file; it only creates a shareable link that loops from the original video. |
| File Output | Keeps the creator's view count and attribution intact. | You don't get a downloadable MP4 file, which is a deal-breaker for offline use or video editing. |
| Cost | Completely free to use. | N/A |
In short, if you just need to share a quick, looping highlight and don't need an actual video file, the native tool is fantastic. For anything more complex, you'll want to look at a dedicated clipping tool.
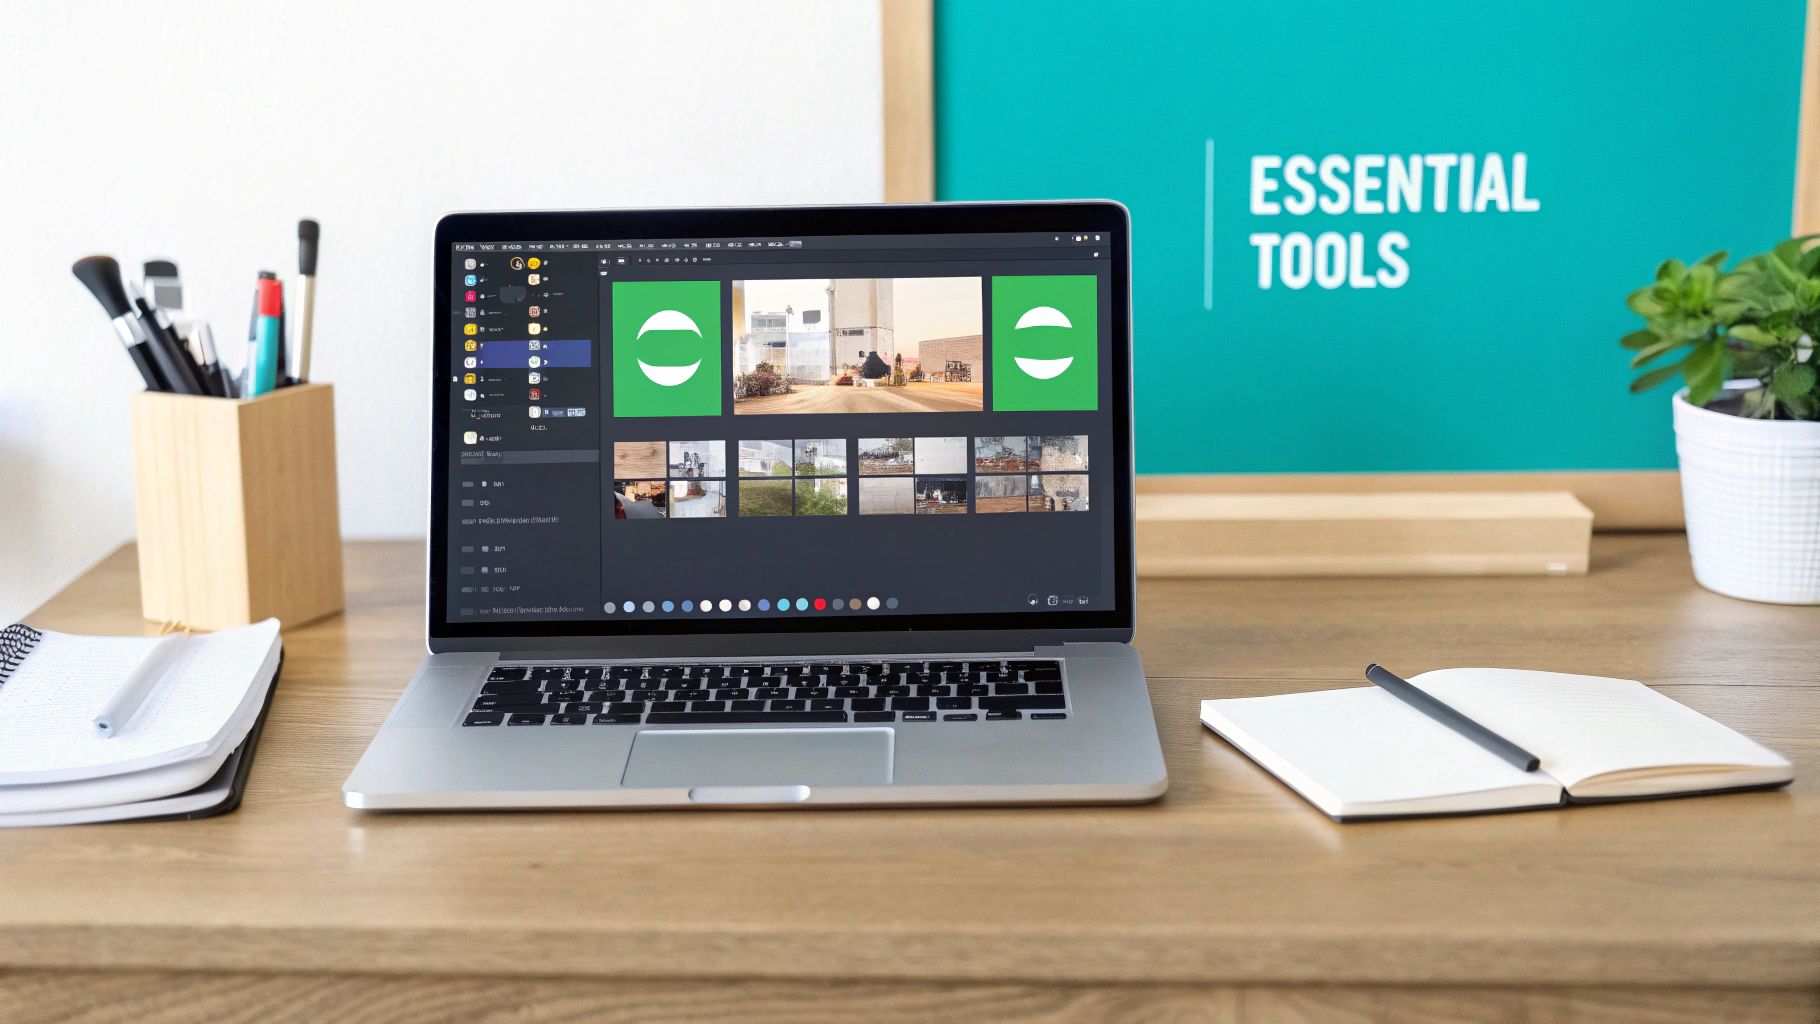
Advanced Clipping with Third-Party Tools
While YouTube's built-in clipper is great for a quick share, you'll quickly hit its limits if you need to do anything more serious. What happens when you need a clip that’s longer than 60 seconds? Or when you need an actual MP4 file to drop into a reaction video or a project compilation? That's where third-party tools step in, offering the power and flexibility the native feature just can't match.
These tools are built to solve the exact frustrations that creators, marketers, and researchers run into every day. They bridge the gap between simple sharing and real content creation, giving you the control to download, edit, and repurpose video segments in ways YouTube doesn't directly allow. Think of them as your personal video editing assistants, ready to grab precisely what you need.
Why You Might Need an External Tool
The reasons to look beyond YouTube's own feature are almost always practical. For a lot of creators, these tools are a core part of the daily workflow, especially when it comes to turning long-form content into bite-sized clips for other platforms. A dedicated tool becomes essential for several key tasks.
You'll probably find yourself needing one if you want to:
- Create clips longer than 60 seconds: This is perfect for grabbing detailed explanations, longer interview segments, or even a full song chorus.
- Download a high-resolution file: This is non-negotiable for anyone doing offline editing in software like Adobe Premiere Pro or Final Cut Pro. You need a quality source file for a professional-looking final product.
- Convert a video snippet directly into a GIF: Essential for making engaging memes or reaction images to share on social media or forums.
- Build a personal archive: Researchers and students often use these to save key moments from lectures or documentaries for offline reference.
These tools can be as simple as a website where you paste a URL or as powerful as desktop software with advanced editing features built right in.
At the end of the day, it all comes down to control. Instead of just getting a shareable link, you get a tangible file. This file can then be trimmed, merged with other clips, or layered with graphics, giving you total creative freedom.
Choosing the Right Clipping Solution
The right tool for you really depends on what you're trying to accomplish. Are you just making a quick GIF for a tweet, or are you pulling together clips for a detailed video essay? A simple online converter will do the trick for the first, but you'll want a dedicated video downloader or editor for the second.
Many modern tools also help streamline more complex workflows. It’s worth taking a look at the possibilities of video editing automation to see just how much time you can save.
Just be aware that the technical side of this is always in flux. YouTube frequently updates its platform to tighten security and API limits, which can sometimes break third-party software. This constant evolution is why finding a reliable, well-maintained tool is so critical for a smooth workflow. You can't afford to have your favorite tool go down right before a deadline.
A Practical Walkthrough with TimeSkip
So, you’ve hit the limits of YouTube’s built-in clipper and need more control. This is where third-party tools come in, and seeing one in action is the best way to grasp just how powerful they can be. Let’s walk through how to create a clip using TimeSkip, a tool I like for its clean interface and ridiculously fast workflow. This isn’t just a feature list; it's a real-world guide to show you how to pull a polished clip from a YouTube video in under a minute.
Imagine you're watching a long financial news report. An analyst drops one killer statistic you absolutely need for a presentation. The native YouTube clipper is too short, and you need an actual video file, not just a link. This is the perfect job for a dedicated clipping tool.
From URL to Finished Clip
The whole process kicks off by simply grabbing the URL of the YouTube video you want to clip. You then paste that link directly into the main field on the TimeSkip website. The tool gets to work instantly, pulling up the video in a simple, intuitive editing interface. This alone is a massive time-saver compared to downloading an entire video just to trim it down later.
Here’s what you see the moment you paste your link.
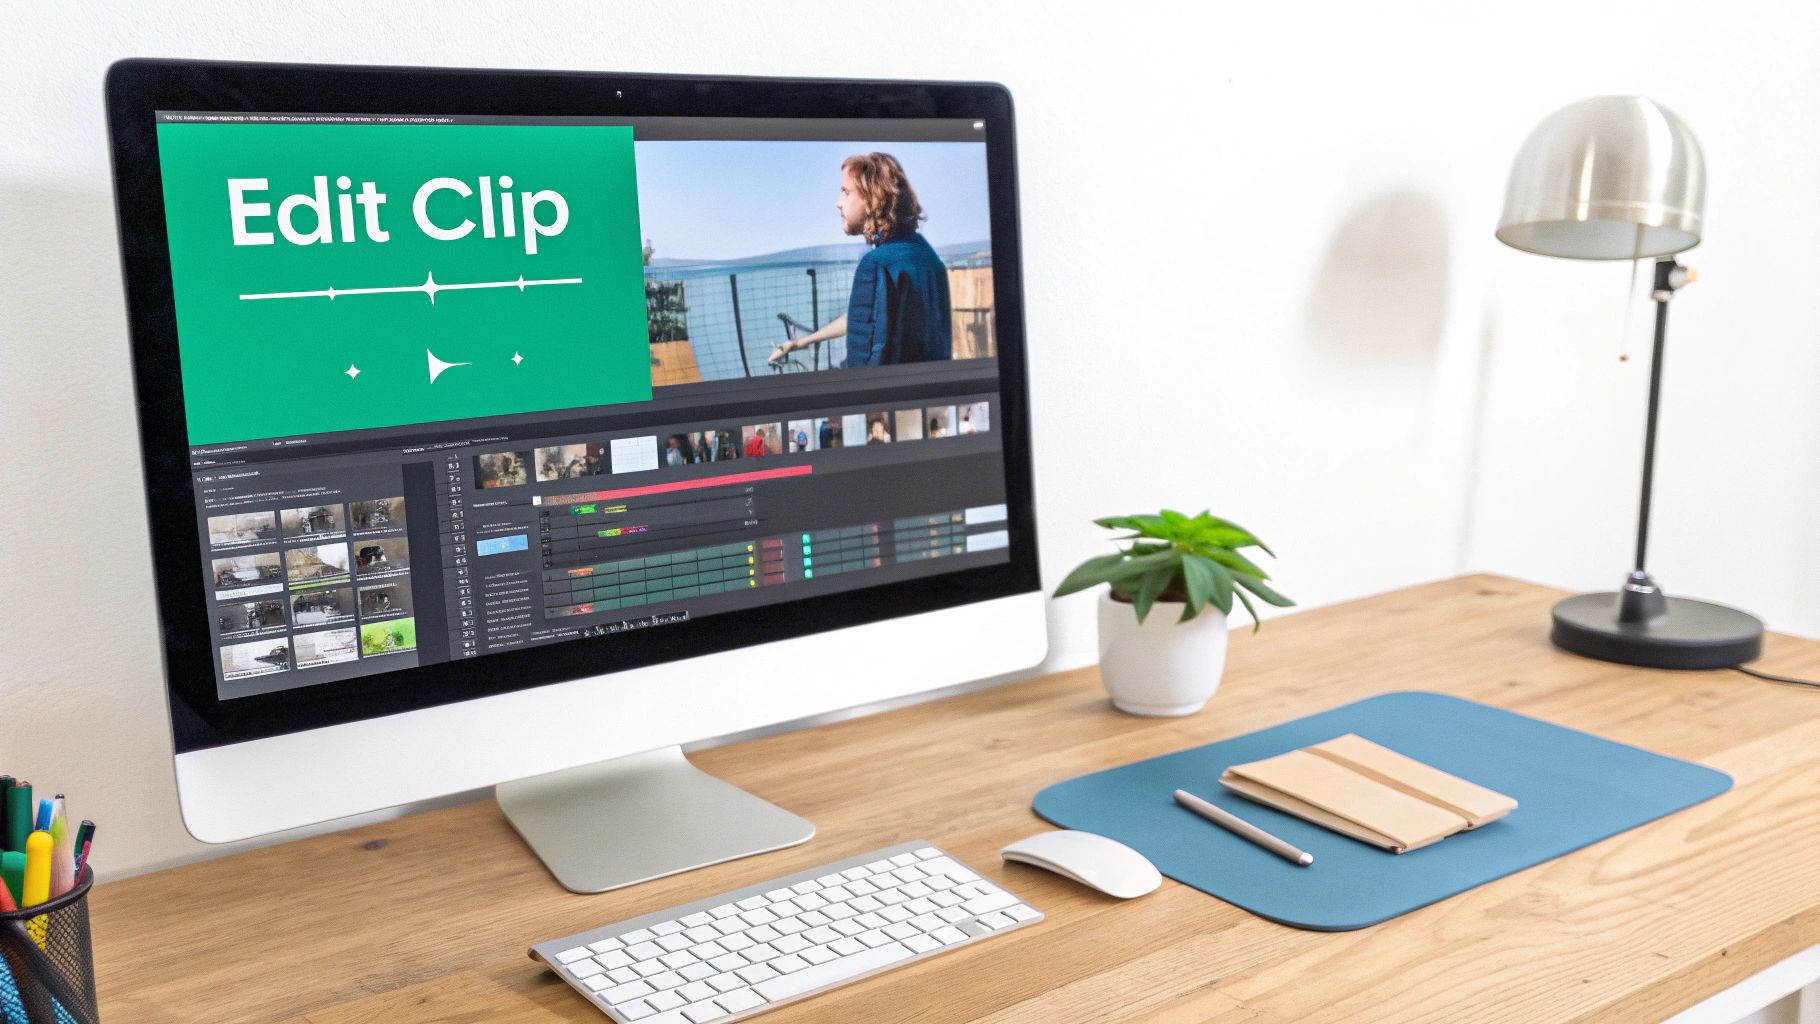
As you can see, the video is loaded and ready to go, with clear controls for picking your start and end points.
Instead of fumbling with timestamps, you just use the interactive sliders on the video timeline to zero in on the exact moment the analyst starts talking and where they finish. You can drag the handles for broad adjustments and then use your arrow keys to nudge them frame-by-frame. That level of control is what ensures you capture the segment perfectly—no awkward lead-in or abrupt cutoff.
Pro Tip: Always hit the preview button to play your selected segment back before you export. This quick check is my go-to for catching small timing mistakes, making sure the final clip is tight and professional.
Exporting and Sharing Your Clip
Once you're happy with the selection, it's time to export. This is where a tool like TimeSkip really leaves the native YouTube option in the dust. You aren't just creating a shareable link; you're actually generating a downloadable file.
You’ll typically see a few export options:
- MP4 Video: This is your workhorse format. It’s perfect for dropping into presentations, uploading to social media, or even using in other video edits.
- GIF: A fantastic choice for creating reaction memes or quick animated snippets for platforms like X (formerly Twitter) or Slack.
- MP3 Audio: Incredibly useful if you only need the audio—think grabbing a soundbite for a podcast or getting a quote transcribed.
For our scenario, you’d choose the MP4 format. After a few seconds of processing, your perfectly trimmed clip is ready to download. You've just turned a fleeting moment from a long video into a focused, reusable asset.
If you want to try it yourself, you can learn more and get started over at the official TimeSkip website.
Navigating Copyright and Fair Use
So, you’ve mastered how to clip YouTube videos. That's the easy part. The real challenge? Using those clips legally.
Every single video uploaded to YouTube is instantly covered by copyright law. That means you can't just grab someone else's content and reuse it without getting their permission first. Ignoring this can get you into hot water, leading to copyright strikes, your channel getting shut down, or even legal trouble.
But it’s not always so black and white. This is where concepts like Fair Use and Creative Commons come into the picture. These are the legal frameworks that can allow you to responsibly reuse content, but only under very specific conditions.
Understanding Fair Use
Fair Use is a legal principle that lets you use copyrighted material in a limited way without needing to ask for permission. Think of it less as a free-for-all and more as a flexible set of guidelines that courts consider.
Here's what they typically look at:
- Purpose and Character: Is your use transformative? Are you adding something new? Commentary, criticism, news reporting, and parody are classic examples. Just re-uploading a clip isn't transformative at all.
- Nature of the Work: It's generally easier to claim fair use for factual content (like a news report) than for highly creative works (like an animated short film).
- Amount Used: Did you only use the small piece necessary to make your point, or did you clip the entire "heart" of the original video? Less is more.
- Effect on the Market: Does your clip stop the original creator from making money from their work? If so, your fair use claim is much weaker.
The most important thing to remember is that your new work has to add something valuable—a fresh perspective, a critique, or new information. Just stringing clips together without original input almost never qualifies as Fair Use.
With 2.5 billion monthly active users, YouTube has to take these rules seriously. The platform's powerful Content ID system is always scanning for copyright infringement, making it absolutely critical to get this right before you hit publish. You can dig into more stats about YouTube's massive global reach at Analyzify.com.
Questions That Pop Up When Clipping Videos
Even with the best tools in hand, you're bound to hit a few snags when you're first figuring out how to grab clips from YouTube. Let's walk through some of the most common questions and roadblocks I see people run into.
Right off the bat, a frequent issue is the mysterious case of the missing "Clip" button on YouTube. If you’re hunting for that little scissors icon and coming up empty, it’s not a glitch. More often than not, the video’s creator has simply turned the feature off. It could also be that the content is marked as "Made for Kids," which automatically disables clipping.
Can I Clip a Private Video?
This one's a hard no. You generally can't clip a private or unlisted video unless you're the one who uploaded it. Clipping tools, whether they're built into YouTube or from a third party, need the video to be public so they can access and process it. The same logic applies to live streams—you'll almost always have to wait until the broadcast is over and it's been published as a regular video.
Another question I get a lot is about quality. The final resolution of your clip really hinges on two things: the quality of the original video and the tool you're using to grab it.
As a rule of thumb, always start with the highest-resolution version of the YouTube video you can find. A clip pulled from a 4K video will always look miles better than one from a 480p upload, no matter what tool you use.
Are There Length Limits on Third-Party Tools?
While YouTube's own clipper puts a tight leash on you at 60 seconds, most third-party tools are much more generous. Many will let you download significantly longer segments, and some can even download entire videos.
However, you'll want to check the fine print for whatever tool you choose. Some free versions might impose their own limits on clip length or the number of clips you can make in a day. A quick check ensures you pick the right tool for your project without bumping into an unexpected paywall.
Ready to create perfectly optimized YouTube chapters in seconds? TimeSkip uses AI to generate SEO-friendly timestamps, boosting your video's visibility and keeping viewers engaged. Try it for free at https://timeskip.io.
